Understanding the Intensity Control
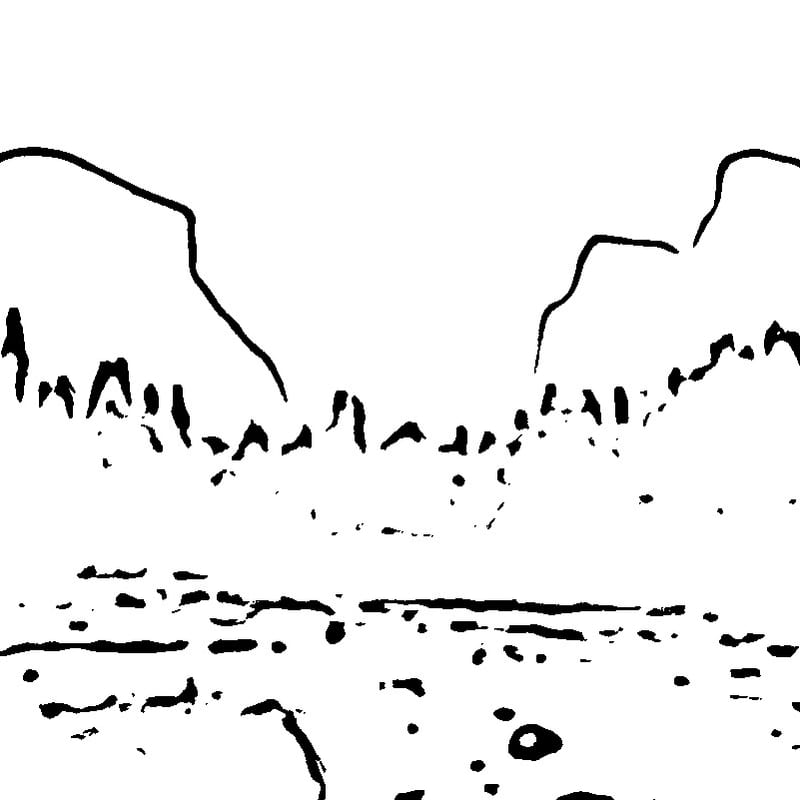
The Intensity slider adjusts the sensitivity of edge detection. At low settings, only the strongest, most prominent edges are captured — producing bold, minimal outlines with large white areas. This is ideal for creating simple outlines for vinyl cutting, logo design, or stencil work. At higher settings, finer edges and subtle details are preserved, producing a richer, more detailed line drawing that resembles a skilled illustrator's work.
Line Weight Adjustment
The Line Weight control thickens or thins all lines in the output. Thicker lines create bold, graphic results suitable for screen printing, vinyl cutting, or designs that need to be visible at small sizes. Thinner lines produce delicate, artistic results that work well for framed prints, illustration bases, and designs meant to be viewed up close.
The Eraser Tool
Automated edge detection sometimes captures unwanted elements — background objects, surface textures, or artifacts from image compression. The built-in Eraser lets you paint over and remove these unwanted marks directly on the result canvas, producing a clean final image without needing to switch to a separate editing application.
Applications Across Creative Fields
Line art conversion serves remarkably diverse purposes. Digital artists use it to create base drawings from reference photographs, saving hours of manual tracing. Graphic designers extract clean outlines for logos, icons, and branding materials. Crafters generate patterns for vinyl cutting machines (Cricut, Silhouette), screen printing, and embroidery digitizing. Teachers create illustration worksheets and educational materials. Technical writers convert product photos into clean diagrams for instruction manuals.
Choosing Photos for Clean Line Art
The quality of the source photograph significantly affects the output. Well-lit images with clear subjects against simple backgrounds produce the cleanest results. Strong directional lighting (from the side or above) creates well-defined shadows that translate into clear lines. Avoid heavily compressed JPEGs, images shot in very low light, or photos with busy, cluttered backgrounds — these introduce noise that appears as unwanted marks in the line art.
Output Format and Resolution
The result exports as a high-resolution PNG with pure white background and clean black lines. The output is suitable for printing at any size, inserting into design documents, or uploading to cutting machine software. All processing happens locally in your browser using WebAssembly technology — your images are never transmitted to any server.
Line art vs sketch vs outline
what's the difference: Line art is an image built purely from solid lines with no shading, gradients, or tonal fill — every mark is either present or absent, which is why it's also called a line drawing. A sketch is looser and exploratory, often including hatching, smudges, and varying pressure to suggest light and volume. An outline is the most minimal form: just the contour or silhouette edges of a subject with no interior detail. This tool produces true line art, capturing both outer contours and meaningful interior edges (facial features, fabric folds, window frames) while discarding flat tonal areas, so the result reads cleanly at any size and prints sharply in black and white.
A short history of line art in art and design
Line drawing predates shading by millennia — the earliest cave paintings at Lascaux are contour drawings, and ancient Greek vase painting relied entirely on line. The technique became a printing necessity: woodcut and engraving could only reproduce lines and dots, which shaped the visual language of Albrecht Durer's prints and later newspaper illustration. In the 20th century, Pablo Picasso's single-line drawings and Henri Matisse's cutout-adjacent contours treated line as expressive shorthand. Today line art dominates technical illustration, logo design, tattoo flash, coloring books, and editorial work precisely because it scales infinitely, photocopies cleanly, and converts directly into vector paths for manufacturing.
Why a browser tool beats Photoshop and Illustrator filters
In Photoshop, the common route is Filter > Stylize > Find Edges or the Photocopy filter, followed by Threshold adjustment and manual level tweaking — typically 6 to 10 steps that produce noisy, gray-speckled edges needing cleanup. Illustrator's Image Trace can vectorize but requires tuning Paths, Corners, and Noise sliders and still chokes on photographic gradients. Both require a paid Adobe subscription (around $23 to $60 per month) and a learning curve. This tool applies adaptive thresholding and bilateral edge detection automatically, returns a clean result in seconds, costs nothing, runs in any browser, and processes your image locally so the photo never leaves your device.
Coloring and Procreate workflow for digital artists
To color line art in Procreate, import the exported PNG, then in the Layers panel tap the layer and set its blend mode to Multiply so the white background becomes transparent and your colors show through underneath. Lock the line layer at the top, create new layers below it for flats, and use the ColorDrop fill or a hard brush to block in color. Because the lines are crisp black with no anti-aliasing artifacts, the Multiply trick works perfectly and reference-layer fills stay inside the contours. The same Multiply technique works in Photoshop, Clip Studio Paint, and Krita for a fast paint-by-layers pipeline.
Vinyl cutting workflow for Cricut and Silhouette
Cutting machines need clean black-and-white shapes, which is exactly what line art provides. Export the PNG, then in Cricut Design Space use Upload > Complex image and the auto-detected cut lines will follow your contours; in Silhouette Studio use the Trace tool with a tight threshold. For weeding success, keep line weight at roughly 0.06 inch (1.5 mm) or thicker so thin strokes don't lift during weeding. The result cuts cleanly from adhesive vinyl, heat-transfer vinyl (HTV) for shirts, or stencil film. Convert closed shapes rather than hairlines when you want a sticker silhouette instead of a fine-line decal.
Tattoo, embroidery, and laser engraving uses
Line art is the native format for several crafts. Tattoo artists use clean line drawings as stencil flash — our tattoo stencil maker prepares them for thermal transfer onto skin before inking. Machine embroidery digitizers convert line art into satin-stitch and running-stitch paths, and grid-based needlework starts the same way — a photo to cross stitch pattern converter turns the same photo into a color-coded chart. Laser engravers and cutters (Glowforge, xTool) read black lines as vector cut or score paths on wood, acrylic, and leather; our laser engraving converter outputs the high-contrast, fill-free files these machines expect. In each case, the output from this tool drops straight into the downstream software.
Tips for portraits, objects, and landscapes
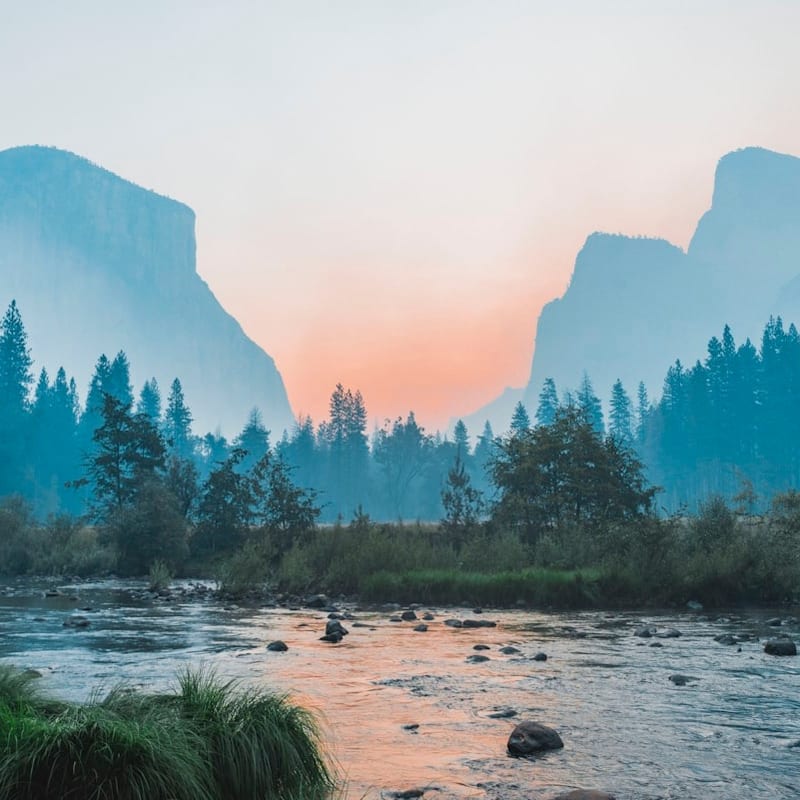
Different subjects need different settings. For portraits, lower the line intensity slightly so skin stays clean and you don't pick up pore-level noise — aim to preserve eyes, hairline, and lip edges while dropping cheek shading. For product or object shots, a higher threshold sharpens hard edges and isolates the silhouette against a plain background, which is ideal for stickers and stencils. For landscapes and architecture, increase detail to capture brick lines, foliage texture, and rooflines, but be ready to use the eraser on busy sky regions. Always start from a well-lit, in-focus photo with clear separation between subject and background.
How do I turn a photo into line art for free
Upload your photo to makelineart.com in any web browser, and the tool automatically converts it into clean black-and-white line art using adaptive edge detection — no account, no payment, and no software install required. Adjust the intensity and line weight sliders until the result looks right, use the eraser to clean up stray marks, then download the PNG. The entire process runs locally in your browser, so your photo is never uploaded to a server, and it typically takes under a minute from upload to finished download.
Is this better than Photoshop for line art
For the specific task of converting a photo to line art, yes, for most people. Photoshop requires a paid subscription and a multi-step manual process of filters, threshold, and cleanup, while this tool produces a comparable or cleaner result automatically and for free. Photoshop still wins if you need pixel-level manual retouching, compositing, or full creative control over every stroke. But if your goal is a fast, clean line drawing for coloring, cutting, printing, or crafting, the browser tool removes the cost, the learning curve, and the wait.
Can I use the line art result commercially
Yes — because the line art is generated from your own uploaded photo, you retain the rights you already held in that source image, and the tool claims no ownership over your output. You can use the results in products you sell, such as printed merchandise, stickers, embroidery, or client work, provided you have the rights to the original photo you uploaded. If you converted someone else's copyrighted photo or a stock image, you still need permission for that source. When in doubt, work from photos you took yourself to keep commercial rights clean.
What kind of photo works best for line art
The best photos are well-lit, in sharp focus, and have strong contrast between the subject and the background. Even, diffused lighting beats harsh shadows because deep shadows turn into large black blobs rather than crisp lines. A clean or simple background helps the edge detection isolate your subject, and high resolution preserves fine detail like hair and texture. Avoid blurry, low-light, or extremely busy images; if your photo is dim, brighten it before uploading, and use the intensity slider plus the eraser to fine-tune the final result.