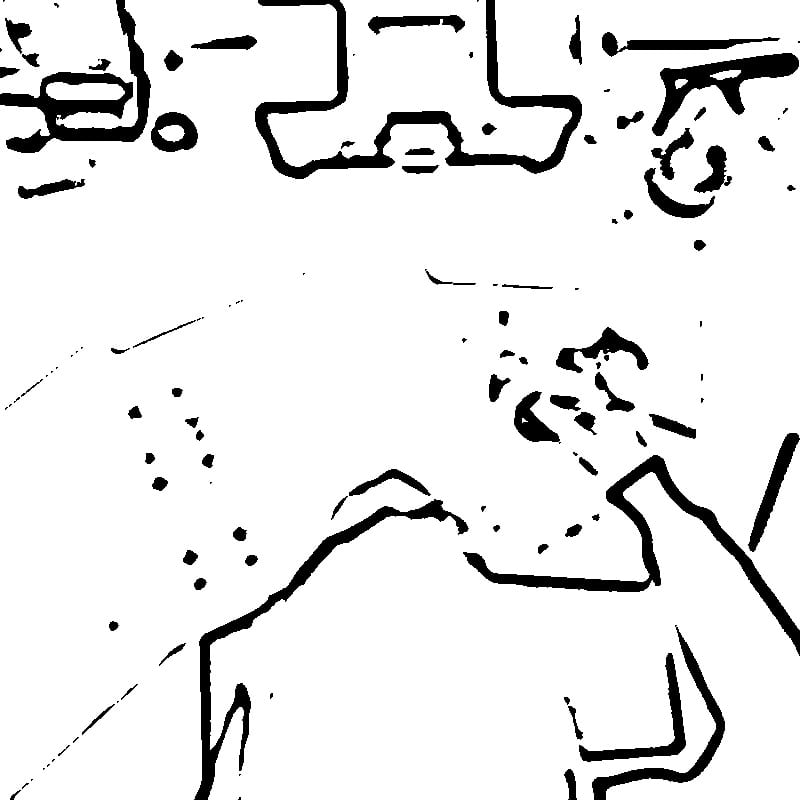
How the Bilateral Filtering and Adaptive Thresholding Pipeline Works: The conversion engine behind this tool uses a two-stage image processing pipeline to transform photographs into technical line art. The first stage applies bilateral filtering, a noise-reduction technique that smooths flat surfaces and gradients while preserving strong edges. Unlike Gaussian blur, which blurs everything equally, bilateral filtering considers both spatial distance and intensity difference between pixels. This means that the boundary between a dark screw and a light housing panel stays sharp, while the subtle texture variations on the panel surface are smoothed away. The second stage applies adaptive thresholding to convert the filtered image into pure black and white. Rather than using a single global brightness cutoff (which would lose detail in shadows or blow out highlights), adaptive thresholding calculates a separate threshold for each small neighborhood of pixels. Areas that are locally darker than their surroundings become black lines; areas that are locally brighter become white. This approach handles photographs with uneven lighting gracefully, preserving detail in both bright and shadowed regions of the product.
How Professional Technical Writers Work
In a professional documentation workflow, the technical writer rarely works in isolation. The process typically begins with a product review, where the writer examines the physical product and identifies which components, assemblies, and procedures need illustration. A shot list is created specifying the angle, zoom level, and key features for each required image. A photographer (or the writer, in smaller organizations) then captures reference photographs following specific guidelines: neutral background, even lighting, consistent scale references, and multiple angles for complex assemblies. The photographs are processed into line art, then refined by a technical illustrator or the writer using editing tools to remove artifacts, add callout lines, and ensure consistency across the entire document. The final illustrations are placed into a structured document, often built using a component content management system that allows reuse of illustrations across multiple publications.
DITA, DocBook, and Image Requirements in Structured Documentation: Modern technical documentation increasingly follows structured authoring standards such as DITA (Darwin Information Typing Architecture) and DocBook. These XML-based standards define strict rules for how content is organized, tagged, and reused. Images in DITA topics are referenced using the \`<image>\` element with required attributes for alternative text (critical for accessibility) and optional attributes for scaling and placement. Both DITA and DocBook strongly recommend using resolution-independent formats, and when raster images are used, they should be high-contrast with clean backgrounds — exactly the output characteristics of this converter. The image naming conventions in these systems often follow structured patterns tied to product model numbers and procedure steps, making batch processing of photos into line art particularly valuable for large documentation sets.
Choosing Source Photos for Technical Documentation
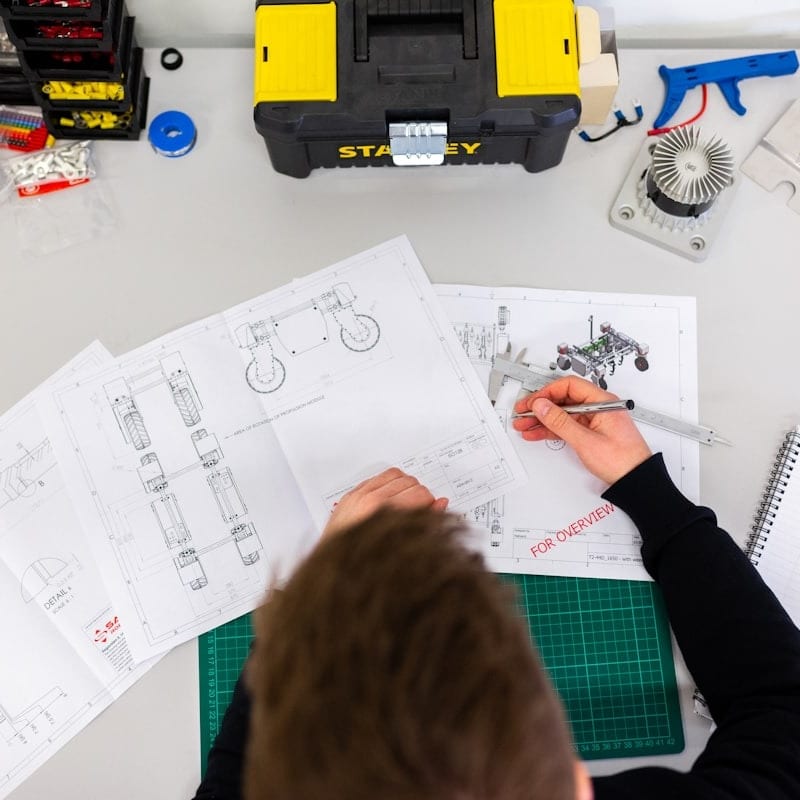
The quality of the final line art depends heavily on the source photograph. The ideal reference photo for manual illustrations has several characteristics. The background should be plain white, light gray, or any uniform neutral color that contrasts with the product. The lighting should be even and diffuse, avoiding harsh shadows that could be misinterpreted as edges by the conversion algorithm. A lightbox or two-softbox studio setup works well for small products. The product should be positioned at the exact angle that best shows the relevant assembly relationship or component location. If the manual requires an exploded view showing how parts fit together, each component should be photographed separately and the writer may need to composite the results. The camera should be positioned at sufficient distance to avoid perspective distortion, and a moderate telephoto focal length (50-100mm equivalent) generally produces the most accurate proportions.
Lighting and Background Setup for Product Photography
For repeatable, professional results, set up a dedicated photography station. A sweep of white poster board or a fabric backdrop creates a seamless background that the converter will render as pure white. Two diffused light sources at 45-degree angles minimize shadows and reflections. For reflective products like chrome hardware or glass screens, use a light tent or surround the product with white reflective panels. Matte spray can temporarily reduce glare on shiny surfaces for photography, though this is only practical for prototypes or products that can be cleaned afterward. Include a scale reference such as a ruler in at least one shot per product, even though it will be removed from the final illustration — it ensures that all illustrations in the manual are proportionally consistent.
The Role of the Eraser Tool in Cleaning Up Automated Output
No automated conversion algorithm produces perfect results on every photograph. The built-in Eraser tool in this converter addresses the gap between automated output and publication-ready illustration. Common artifacts that need cleanup include: background shadows that were dark enough to register as edges, surface textures on machined metal parts that create busy visual noise, manufacturer logos or labels that are not relevant to the instruction being illustrated, and thin connecting lines between closely spaced components that should appear as separate parts. The Eraser allows you to paint over these unwanted marks directly on the output canvas. For technical documentation, this cleanup step is essential — a stray line could be misinterpreted as a component boundary, leading to assembly errors.
Comparison with Professional Vector Illustration Software
Professional technical illustration is traditionally created in vector software such as Adobe Illustrator or the open-source Inkscape. These tools allow illustrators to create mathematically precise drawings with perfect curves, consistent line weights, and unlimited scalability. The process, however, is labor-intensive: a single exploded-view illustration of a moderately complex product might take a skilled illustrator eight to sixteen hours. This photo-to-line-art converter occupies a different position in the workflow. It produces raster line art in seconds, which is often sufficient for quick-reference guides, internal documentation, field service manuals, and any context where speed matters more than geometric perfection. For organizations that need both, the converter output can serve as an underlay in Illustrator or Inkscape — the illustrator traces over the automatically generated lines, saving significant time compared to working from the photograph directly. Some technical writers also use the converter output directly in documentation and reserve hand-illustrated vector art only for flagship products or marketing materials.
Print vs Digital Documentation Considerations
The output format requirements differ between print and digital documentation. Print manuals need images at 300 DPI or higher, with pure black lines on pure white backgrounds for clean single-color reproduction. The PNG output from this converter meets these requirements directly. Digital documentation — web-based help systems, PDF manuals, and in-app guidance — can use lower resolution but benefits from the same clean line art aesthetic for consistency and fast loading. If your documentation is delivered in both formats from a single source (as in DITA-based publishing), prepare your images at print resolution and let the publishing engine downsample for digital output.
Accessibility in Technical Documentation
Modern documentation standards require attention to accessibility. Images in manuals must have descriptive alternative text so that screen reader users can understand the illustrated content. Line art supports accessibility better than photographs because the visual content is simpler and more easily described. Additionally, line art maintains its clarity for users with low vision or color vision deficiency, since it does not rely on color or subtle tonal differences to convey information. The high contrast ratio of pure black lines on pure white backgrounds exceeds WCAG AA contrast requirements by a wide margin.
ISO Standards for Technical Illustrations
Several ISO standards govern technical illustrations in professional documentation. ISO 128 defines general principles for technical drawings, including line types, line widths, and projection methods. ISO 7010 specifies safety symbols that often appear alongside technical illustrations in manuals. ISO 82079-1 provides guidelines for the preparation of instructions for use, including requirements for illustration quality, consistency, and placement relative to text. While these standards were written primarily for hand-drafted or CAD-generated drawings, the principles apply equally to photo-converted line art: consistent line weight, clear contrast, appropriate level of detail for the intended audience, and accurate representation of the product's physical characteristics.
Workflow from Photo to Final Manual Page
A complete workflow for producing manual illustrations with this tool follows these steps. Capture reference photographs following the lighting and background guidelines described above. Upload each photo to the converter and adjust the Intensity slider — start at a moderate setting and increase until all relevant component boundaries are visible without excessive noise. Use the Eraser tool to remove any artifacts, background remnants, or irrelevant details. Download the cleaned line art as PNG. Import the PNG into your page layout application (Adobe InDesign, FrameMaker, or an XML editor for DITA/DocBook), position it within the text flow, add callout numbers or labels using the layout tool's annotation features, and write the corresponding step text. This workflow produces consistent, professional technical documentation at a fraction of the time and cost of traditional hand illustration. For related conversion needs, you might also find our general line art converter or blueprint-style converter useful for different documentation contexts.
All processing runs entirely in your browser using WebAssembly technology — your proprietary product photographs are never transmitted to any server. This is particularly important for documentation teams working with pre-release products under NDA, where image confidentiality is essential. The tool is completely free with no account required.