How to Design Stained Glass Patterns from Photos — Beginner to Advanced
A photo can be a good starting point for a stained glass pattern, but it is never the finished pattern. Glass has to be cut into pieces you can actually score, break and grind, and every piece needs a closed outline. This guide shows what a photo-to-pattern converter gives you, where it falls short, and what you still need to do by hand before you cut glass.
The examples below come from the stained glass pattern maker on this site. Each one is the real output with default settings, not a retouched result.
What a usable pattern needs
Three rules matter more than anything else:
- Every shape must be closed. Each closed shape is one piece of glass. If a line stops short, there is nothing to cut.
- Pieces must be big enough to cut. As a rough guide, keep pieces at least 2 cm (3/4 inch) across. Narrow slivers and sharp points crack while you cut or grind them.
- Avoid deep inside curves. Glass does not bend. A deep concave curve usually breaks, so split it into two pieces or make the curve shallower.
A converter can get you close on the first point. It cannot judge the second and third for you.
Test 1: a rose in a vase (the good case)
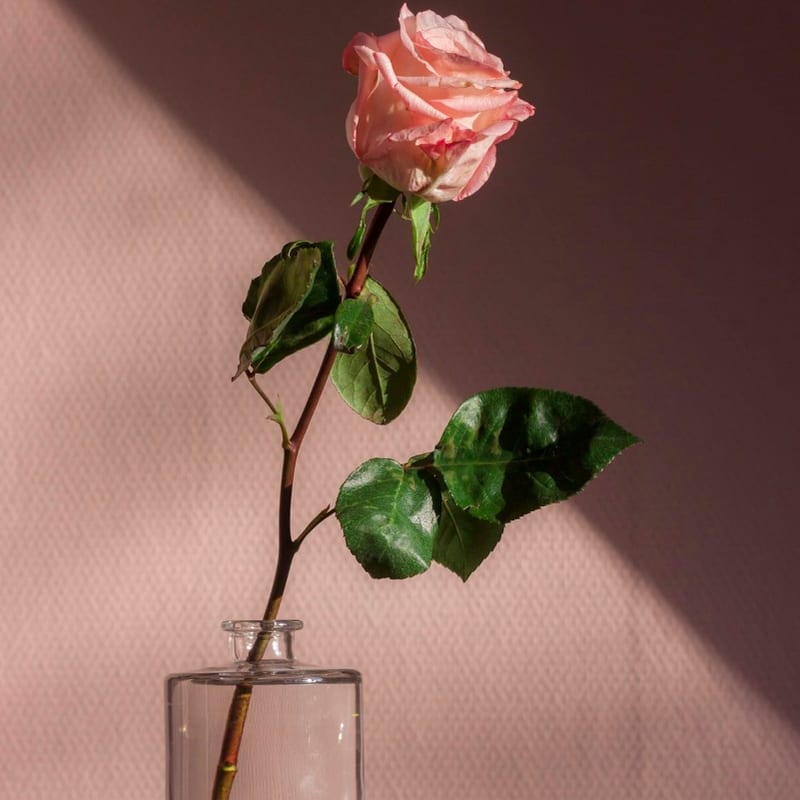
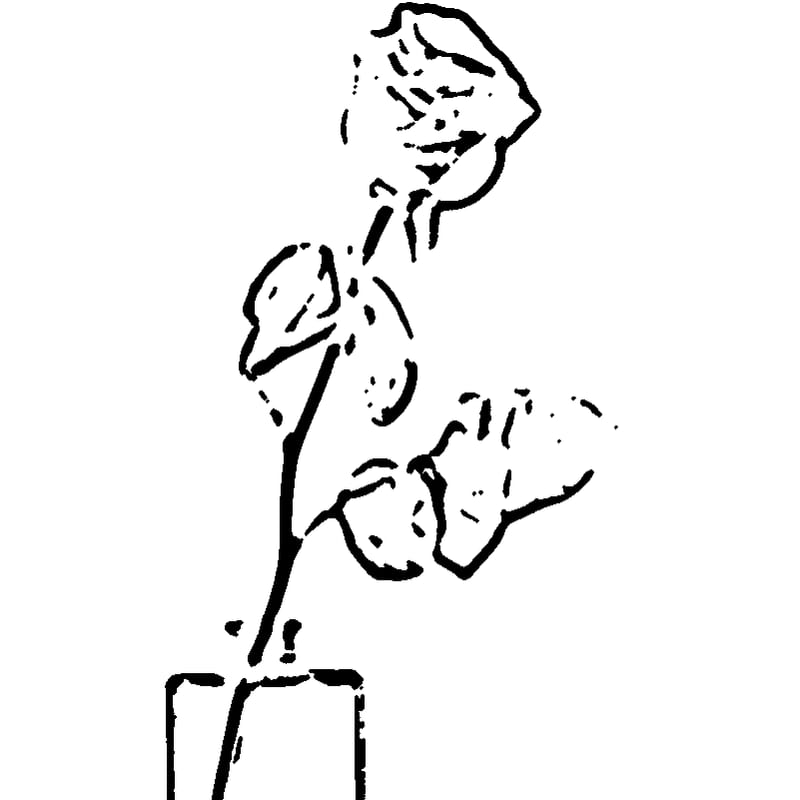
This is close to an ideal source photo: one subject, a plain wall behind it, and clear edges between petals, leaves, stem and vase. The converter traced all of those. The soft diagonal shadow on the wall was ignored, which is what you want.
It is still not cut-ready. Several leaf edges stay open, and the stem is a pair of thin lines rather than a closed strip. Before cutting, close those gaps and decide whether the stem becomes one long narrow piece (risky) or a few shorter ones.
Test 2: a sunflower (too many pieces)
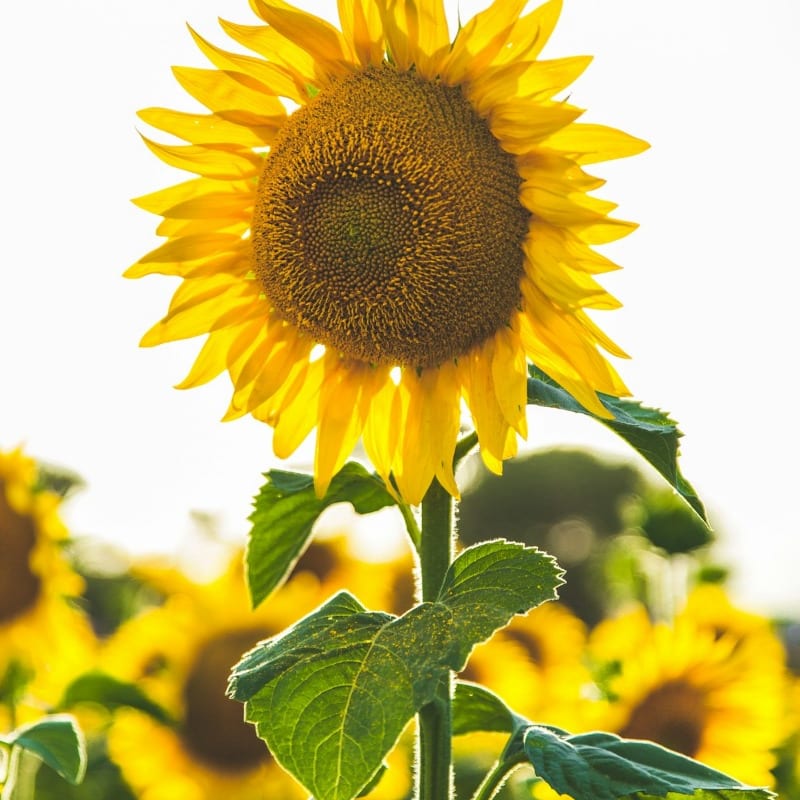
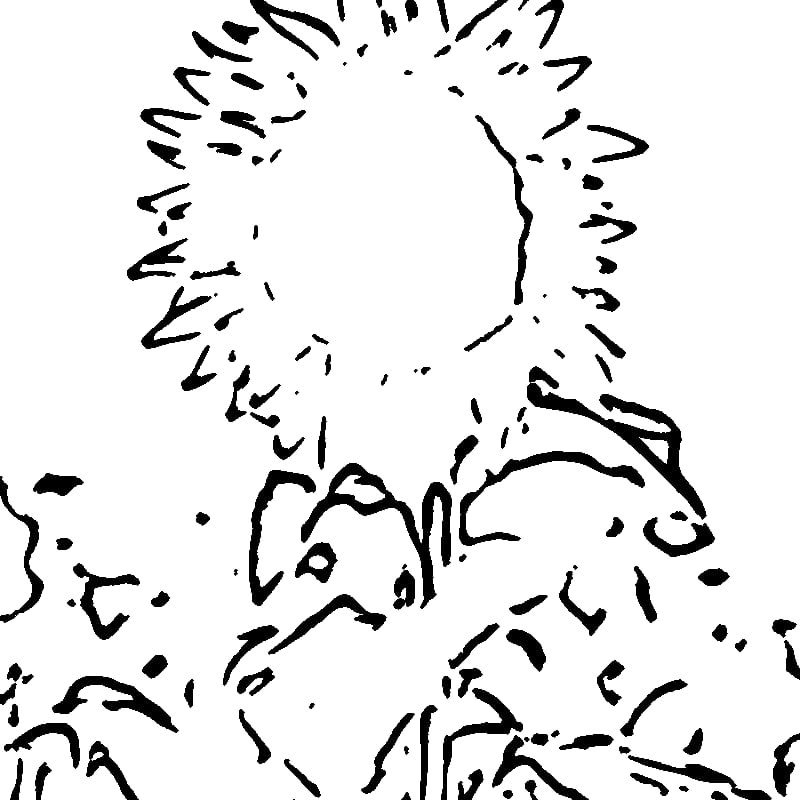
Every petal, and every small flower in the background, became its own shape. That is far too many pieces for real glass. Use a result like this as a drawing reference: keep the flower head and a handful of petals, merge the rest, and drop the background flowers entirely.
Test 3: a cat (too few lines)

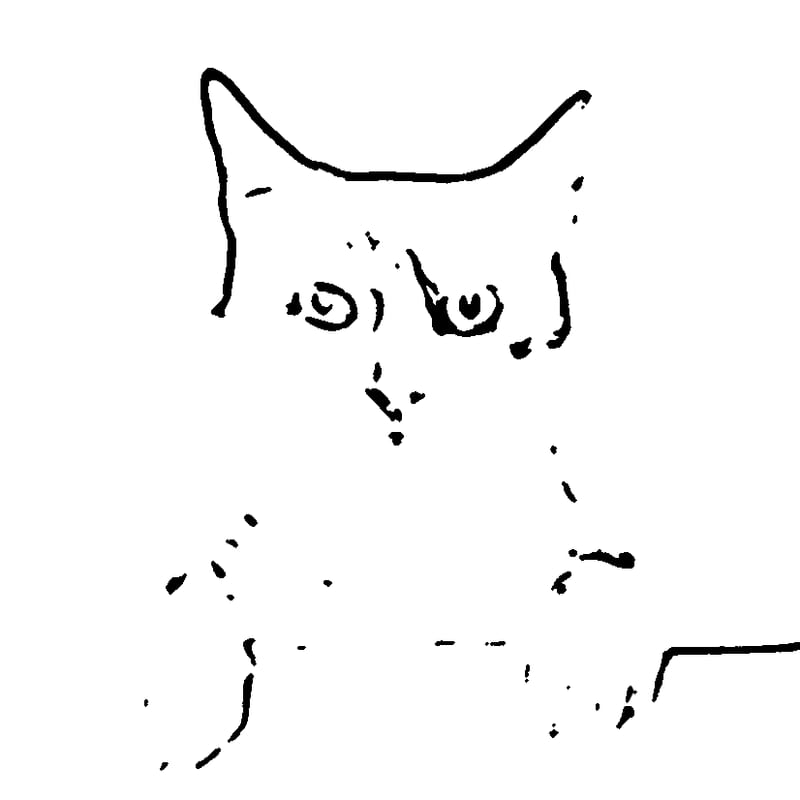
The opposite problem. Only the ears, eyes and nose came through, because the white fur has almost no edges for the converter to find. You would have to draw the body outline and the dividing lines yourself. Subjects with big blocks of even color tend to do this.
Test 4: a busy background (the weak case)

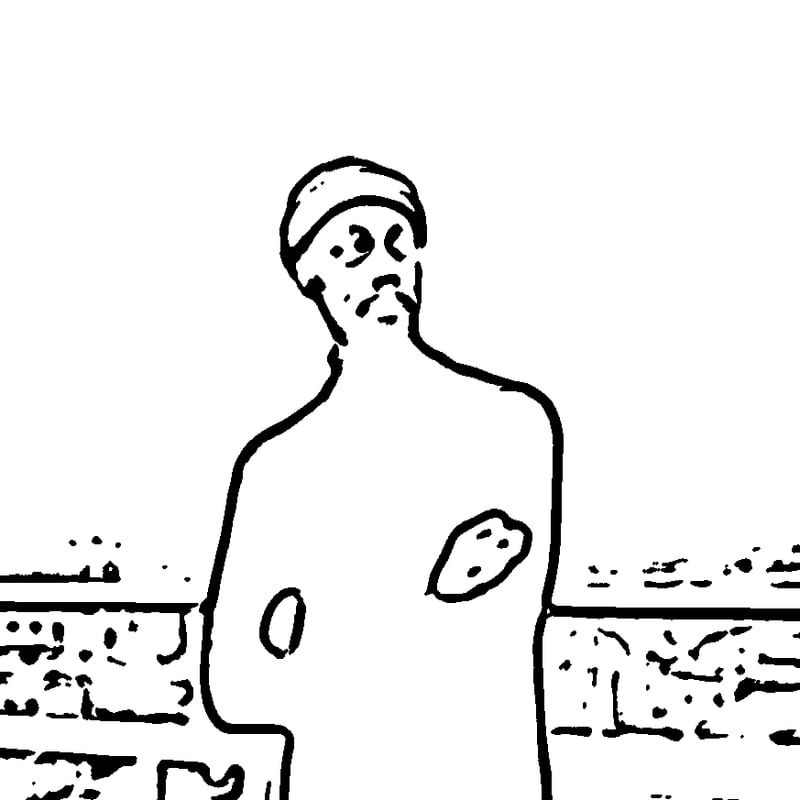
The person converted reasonably well, but the city skyline behind him turned into dozens of tiny fragments along the bottom. Crop to the subject before converting. If you want a background, draw a few large shapes for it by hand.
How to pick a photo that converts well
From these tests, the photos that work have:
- One clear subject that still reads when it is reduced to roughly 20 to 50 shapes.
- A plain or blurred background. Busy backgrounds become fragments.
- Clear edges between areas of different color. Large areas of one even color give you too few lines.
Crop tightly before you upload. It is the single change that improved my results most.
Step-by-step workflow
- Crop the photo to the shape of your panel and remove as much background as you can.
- Convert it with the stained glass pattern maker. The tool thickens the lines and closes small gaps, but it does not guarantee that every region is closed.
- Print it and close every open line with a pen. Gaps where two lines almost meet are the most common problem.
- Merge or split pieces. Combine slivers into larger pieces, and split deep inside curves.
- Add a border around the edge. It gives the panel a structural frame.
- Number every piece and print two full-size copies: one to keep as a reference and one to cut into templates.
Line weight: copper foil vs lead came
Decide on the technique before you finalize the pattern, because it changes how thick the lines should be:
- Copper foil (Tiffany method) gives thin solder lines, typically 2 to 3 mm. It allows smaller pieces and tighter curves, so it suits detailed sun catchers and lamps.
- Lead came has a visible face of about 4 to 6 mm for common sizes. Wider lines mean slightly smaller glass pieces, so leave a little room in the pattern.
- Zinc came is stiffer and is usually used for the outer border.
Pattern shears for your technique remove a thin strip of paper between templates to leave room for the foil or the heart of the came.
Color planning
Color in a printed copy before you buy glass, then hold it up to a window. Beginners should stay with three to five colors. Remember that the same glass looks very different in direct sun and in diffused north light.
Tools and safety, briefly
You need a glass cutter, running and breaking pliers, a soldering iron of about 75 to 100 watts, flux, solder and either copper foil or lead came. A grinder is not strictly required for a first sun catcher, but it makes fitting pieces much easier. For copper foil, 60/40 tin-lead solder is the common choice; for lead came, 50/50 is common. Lead-free solder is available.
Always wear safety glasses when cutting and grinding. Solder in a well-ventilated space or with a fume extractor, wash your hands after handling lead, and do not eat or drink at the bench.
Frequently Asked Questions
Can I convert any photo into a stained glass pattern?
You can convert any photo, but as the tests above show, the result is only a starting point. One subject, a plain background and clear color edges give the most usable patterns.
Is the converted pattern ready to cut?
No. Check every shape is closed, merge pieces that are too small, and split deep inside curves before you cut glass.
How many pieces should a first project have?
Ten to twenty is a good range. Larger panels can have 100 or more, but that takes much more cutting and grinding practice.
What is the smallest piece I can cut?
As a practical guide, avoid pieces narrower than about 2 cm (3/4 inch), and avoid sharp points and deep inside curves.